There’s a category of studio effect that looks spectacular on set and falls completely flat in the final image. I’ve been burned by this more times than I care to admit. The disconnect usually comes down to one thing: your eye adapts to what it sees in the room, but the camera captures only what the light is actually doing. That gap between perception and capture is exactly what this technique forces you to confront. In this Westcott Lighting tutorial, Ashley walks through how she built a mirrored prism lighting effect entirely in-camera, including the dead ends she hit the first time she tried it five years ago and the specific changes that finally made it work. Watch the full tutorial on YouTube
What I appreciate most about her approach is the diagnostic thinking. She doesn’t just show you the pretty result. She shows you the failed test shot, explains why it failed, and reasons through two different solutions before picking one. That’s how real studio problem-solving works, and it’s the part that most tutorials skip entirely.
The core technique here is simple to describe and genuinely tricky to execute: three mirrors gaffer-taped into a triangular prism, a light source fired through the center, and the resulting reflected pattern projected across a backdrop and subject. The execution depends heavily on which light source you choose and exactly where you place everything. Get those two variables wrong and you’ll have the same frustrating experience Ashley had in round one.
Step 1: Build the Mirror Prism
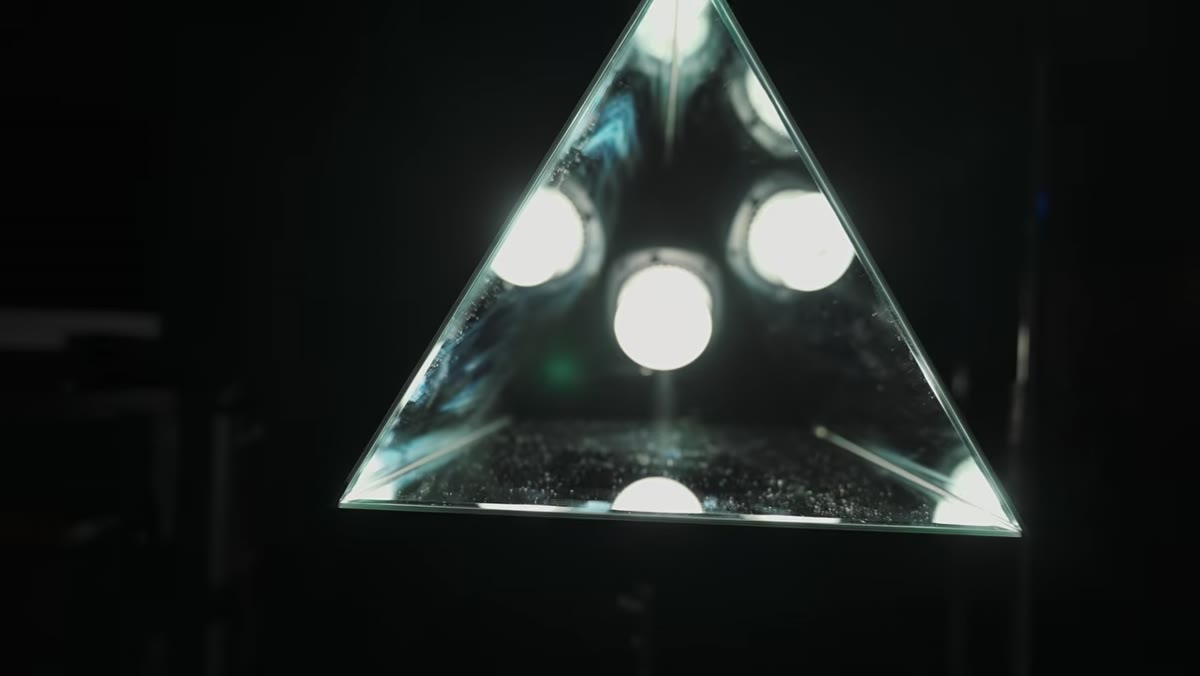 Three mirrors gaffer-taped into triangular prism shape
Three mirrors, gaffer tape, and some patience. That’s the entire build. You’re creating a triangular tube by taping the mirrors together along their long edges so the reflective surfaces face inward. The size of the prism determines the scale of the pattern, so experiment with mirror dimensions before committing to a full shoot. Ashley kept hers relatively compact, which gave her a pattern that spread dynamically across the background rather than filling the whole frame uniformly. I’d suggest building at least two sizes if you have spare mirrors lying around, then testing both before your subject arrives.
Three mirrors gaffer-taped into triangular prism shape
Three mirrors, gaffer tape, and some patience. That’s the entire build. You’re creating a triangular tube by taping the mirrors together along their long edges so the reflective surfaces face inward. The size of the prism determines the scale of the pattern, so experiment with mirror dimensions before committing to a full shoot. Ashley kept hers relatively compact, which gave her a pattern that spread dynamically across the background rather than filling the whole frame uniformly. I’d suggest building at least two sizes if you have spare mirrors lying around, then testing both before your subject arrives.
Step 2: Orient the Prism to Control the Pattern Shape
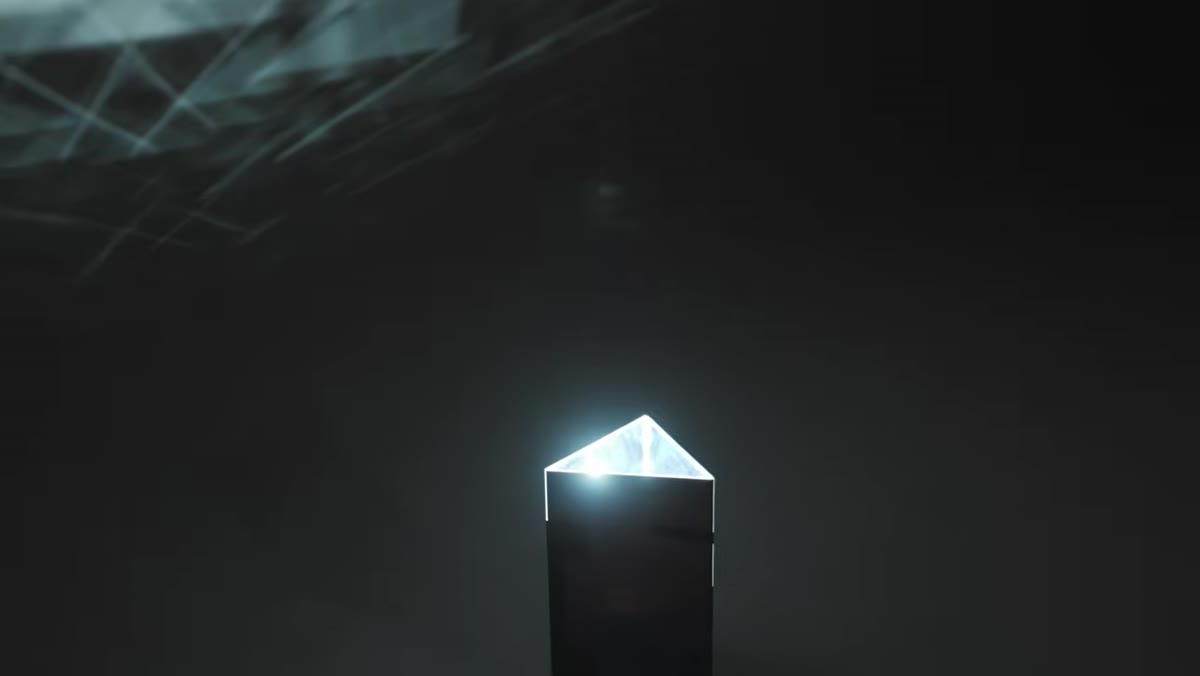 Mirror prism positioned facing upward toward backdrop
This is the detail that changed everything for Ashley between her first attempt and this one. In the original shoot, she pointed the prism and light directly at the subject. In this version, she rotated the setup so the mirrors face straight up rather than toward the model. That single change transforms the geometry of the projection. Instead of a static triangle centered on the subject, the pattern now starts small near the floor and fans outward as it climbs the backdrop, which reads as far more dynamic in camera. When I sketch new setups in my lighting journal, I always note the orientation of any directional modifier or practical element like this, because a few degrees of rotation can completely change what the camera sees.
Mirror prism positioned facing upward toward backdrop
This is the detail that changed everything for Ashley between her first attempt and this one. In the original shoot, she pointed the prism and light directly at the subject. In this version, she rotated the setup so the mirrors face straight up rather than toward the model. That single change transforms the geometry of the projection. Instead of a static triangle centered on the subject, the pattern now starts small near the floor and fans outward as it climbs the backdrop, which reads as far more dynamic in camera. When I sketch new setups in my lighting journal, I always note the orientation of any directional modifier or practical element like this, because a few degrees of rotation can completely change what the camera sees.
Step 3: Move Your Subject Away from the Backdrop
 Subject positioned well forward from backdrop showing full pattern
Ashley’s biggest mistake in the original shoot was placing the subject too close to the background. When the subject stands right against the backdrop, you compress the depth of the effect and lose the most interesting parts of the pattern, which tend to live at the outer edges rather than the center. Pull your subject forward significantly. This gives the light room to spread across the backdrop behind them and lets you frame the subject against the full geometry of the reflection rather than just the middle of it. Think of the background pattern as its own compositional element that your subject needs to relate to, not just stand in front of.
Subject positioned well forward from backdrop showing full pattern
Ashley’s biggest mistake in the original shoot was placing the subject too close to the background. When the subject stands right against the backdrop, you compress the depth of the effect and lose the most interesting parts of the pattern, which tend to live at the outer edges rather than the center. Pull your subject forward significantly. This gives the light room to spread across the backdrop behind them and lets you frame the subject against the full geometry of the reflection rather than just the middle of it. Think of the background pattern as its own compositional element that your subject needs to relate to, not just stand in front of.
Step 4: Choose the Right Light Source (This Is the Critical Step)
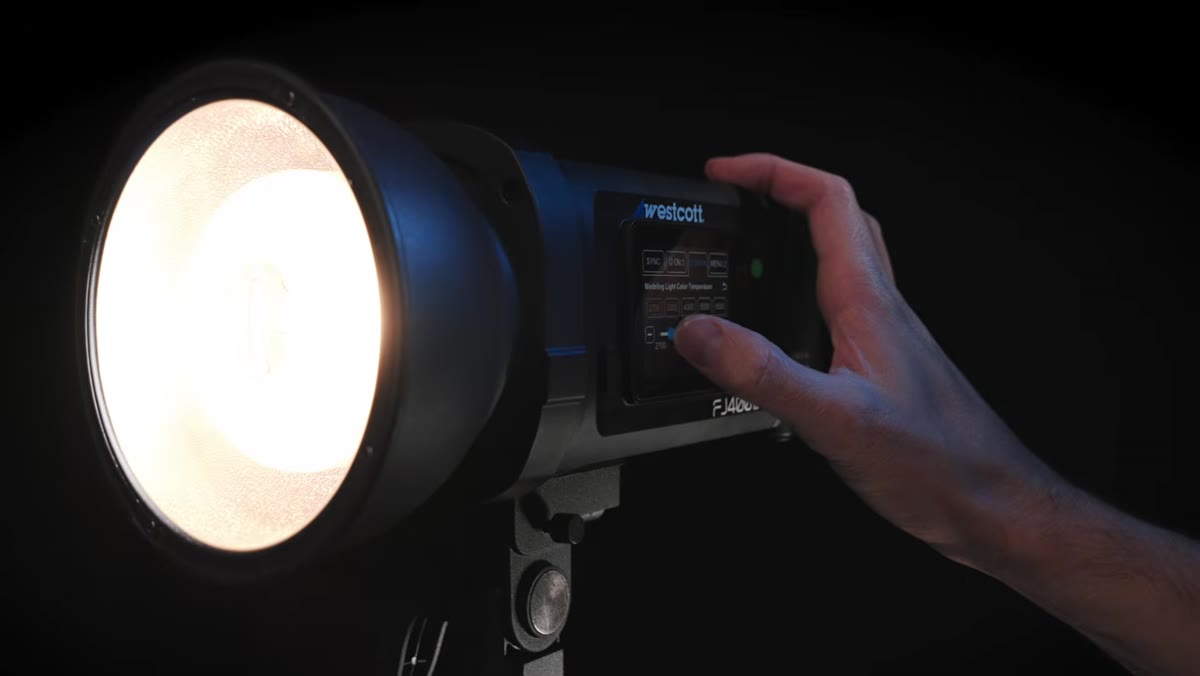 FJ400 strobe versus L120B LED comparison on camera display
Here is where most people would give up and blame the mirrors. Ashley didn’t, and the reason she found the solution is that she asked a precise question: what is different between what I see with my eyes and what the camera captures? The answer was the light source itself.
FJ400 strobe versus L120B LED comparison on camera display
Here is where most people would give up and blame the mirrors. Ashley didn’t, and the reason she found the solution is that she asked a precise question: what is different between what I see with my eyes and what the camera captures? The answer was the light source itself.
She initially used the Westcott FJ400 Version 2 strobe. The modeling lamp in that unit is a small COB LED with a tight, controlled beam, which is what your eye sees when you look at the prism on set. But the actual flash output comes from an Omega flash tube that wraps around the bulb and throws light in all directions. That spread softens the edges of the reflected mirror pattern in the captured image even though your eye, reading the modeling light, sees crisp lines. She considered adding an optical spot to control the beam, but it would have forced her to raise the prism higher than she wanted. Instead, she switched entirely to a continuous LED source: the Westcott L120B. The LED chip in that unit behaves the same way the modeling lamp did, so what you see on set is what the camera records. Crisp, geometric reflections. No more soft edges.
The lesson here is not “use this specific light.” It’s that any continuous point-source LED with a tight beam angle will give you the same result. If you’re working with what you have, look for a light source where the modeling behavior and the capture behavior are the same thing.
Step 5: Add a Separate Key Light for the Subject
 Second L120B positioned as key light with trimmed modifier
Once the background effect is locked in, your subject still needs to be lit. Ashley added a second L120B as the main light on the model and modified the light’s modifier by cutting it down so the light source sat higher in the frame. This is a small but important decision. When your background has a strong geometric pattern, your key light’s visual footprint needs to feel intentional within that composition. A modifier that’s too wide or too low can create a pool of light that fights the graphic quality of the backdrop rather than complementing it. Match the visual language of your effects light when you’re designing your key.
Second L120B positioned as key light with trimmed modifier
Once the background effect is locked in, your subject still needs to be lit. Ashley added a second L120B as the main light on the model and modified the light’s modifier by cutting it down so the light source sat higher in the frame. This is a small but important decision. When your background has a strong geometric pattern, your key light’s visual footprint needs to feel intentional within that composition. A modifier that’s too wide or too low can create a pool of light that fights the graphic quality of the backdrop rather than complementing it. Match the visual language of your effects light when you’re designing your key.
What I Would Test Next
The one variable Ashley didn’t explore in this tutorial is color temperature as a creative tool. The L120B is bi-color, which means you can shift the background pattern warmer or cooler while keeping your key light neutral, or push them in opposite directions for a split-toned effect that the mirrored geometry would amplify beautifully. I ruined an early editorial shoot by ignoring color temperature entirely, and ever since I’ve treated it as a compositional element, not just a technical correction. With a technique this visually driven, that control is worth experimenting with before you commit to your hero frames.
The single most important takeaway from this tutorial is something Ashley states plainly but that deserves to be repeated: test before the shoot. She came in ahead of time, worked through every problem with the strobe, identified the solution, and rebuilt the setup clean on shoot day. That’s not extra work. That’s the reason the actual shoot went smoothly. Pre-testing is how you show up for your client or subject with confidence instead of apologies.
Watch the full tutorial on YouTube to see Ashley’s final images and the complete lighting placement in context.
Comments (4)
Ran through this tutorial twice and my edits are way more consistent now.
Would this approach work the same way with natural light instead of strobes?
Do you have any tips for applying this to landscape work?
Quick question: does the order of steps matter or can I rearrange to fit my workflow?
Leave a Comment